Sculpt Your Arms with This Epic Resistance Band Arm Workout
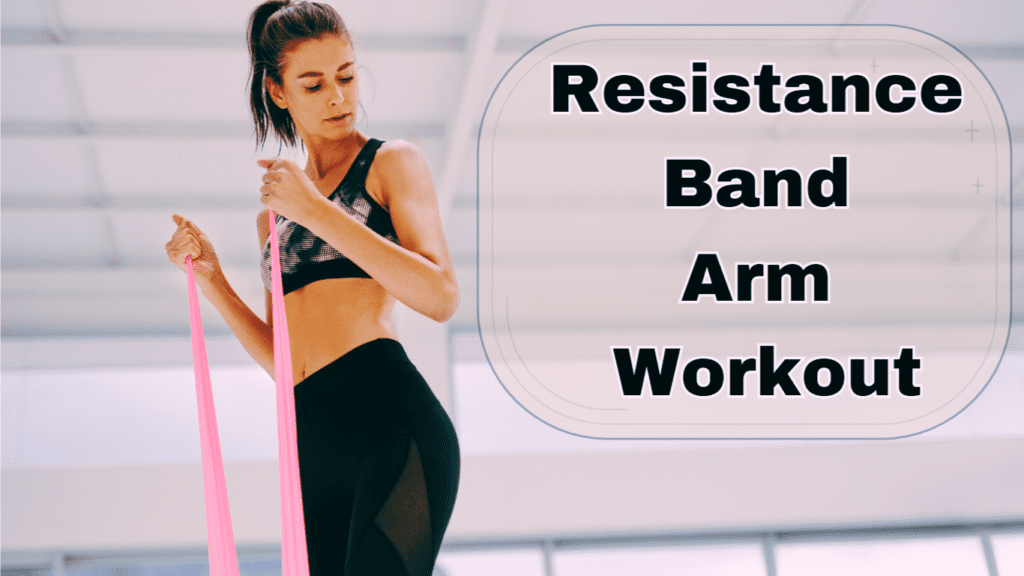
Alright, let’s dive into the world of resistance band arm workout! Imagine yourself strolling along the beach, feeling confident as you flex those toned arms or waving hello to a friend with a sense of pride. It’s not just a dream; it’s well within your reach with the power of resistance bands.
Now, let me share a little anecdote with you about the effectiveness of these versatile tools. I once had a client named Alex who was struggling to see progress in his arm workouts. No matter how hard he worked at the gym, his arms just didn’t seem to be getting any stronger or more defined. That’s when I introduced him to resistance band arm workouts.

At first, Alex was hesitant. Like many people, he was used to traditional weightlifting exercises and wasn’t sure if resistance bands could really deliver the same results. But after just a few sessions, he was amazed at the difference they made. The constant tension provided by the bands challenged his muscles in new and exciting ways, helping him break through plateaus and see real progress.
Now, Alex swears by his resistance band arm workout. He loves the freedom and versatility they offer, allowing him to target his arms from every angle and get a killer pump with every rep. And let me tell you, his arms have never looked better!
Subscribe And Get Our Free E-Book:Unlocking The Power Of Nutrition-Supplements, Substitutes, and Superfoods!
Comparative Benefits of Resistance Band Workouts vs. Traditional Arm Exercises
| Feature/Benefit | Resistance Bands | Traditional Weights | Bodyweight Exercises |
|---|---|---|---|
| Versatility | High – Can adjust resistance easily | Moderate – Requires different weights for progression | Low – Limited by body weight |
| Portability | Very High – Lightweight and compact | Low – Bulky and heavy equipment | Very High – No equipment needed |
| Cost | Low – Inexpensive and durable | High – Expensive, especially for a full set | None – No cost |
| Range of Motion | High – Provides constant tension throughout the movement | Moderate – Limited by gravity | High – Natural body movements |
| Muscle Activation | High – Engages stabilizer muscles | Moderate – Primarily targets major muscle groups | High – Engages multiple muscle groups |
| Risk of Injury | Low – Lower risk of strain or injury | Moderate to High – Risk of dropping weights or improper form | Low – Natural movements, but can strain without proper form |
| Adaptability | Very High – Suitable for all fitness levels | Moderate – Requires different weights for different levels | High – Can modify exercises to increase difficulty |
| Space Requirement | Very Low – Minimal space needed | High – Requires a designated workout area | Very Low – Can be done in small spaces |
| Workout Variety | High – Many different exercises possible | Moderate – Limited by available weights and equipment | High – Many exercises and variations available |
| Effectiveness for Toning | High – Effective for sculpting and defining muscles | High – Effective for muscle building and strength training | High – Effective for overall toning and conditioning |
So, if you’re ready to take your arm workouts to the next level, I’ve got just the routine for you. Get ready for an exciting, effective workout that will leave your arms feeling pumped and powerful. With the magic of resistance bands, you’ll be well on your way to sculpted, toned arms that you’ll be proud to show off. Let’s make those arm gains together!
Understanding Resistance Bands
Before we jump into the exercises, let’s take a moment to understand what resistance bands are and how they work.
Resistance bands are essentially elastic bands that come in various shapes, sizes, and levels of resistance. They work by providing resistance against your muscles as you move against them. The further you stretch the band, the more resistance it provides, making your muscles work harder.
Now, let’s talk about the benefits of incorporating resistance bands into your arm workouts. First and foremost, they offer incredible versatility. With just a single set of resistance bands, you can target virtually every muscle group in your arms, from your biceps and triceps to your shoulders and forearms. This makes them a fantastic option for those looking to get a full arm workout without the need for bulky equipment.
Another major benefit of resistance bands is their portability. Unlike dumbbells or barbells, which can be cumbersome to transport, resistance bands are lightweight and compact, making them perfect for travel or for those who prefer to work out at home. You can easily throw a set of resistance bands in your gym bag or suitcase and take your arm workout with you wherever you go.
But perhaps the greatest advantage of resistance bands is their scalability. Whether you’re a beginner just starting out on your fitness journey or a seasoned pro looking to take your workouts to the next level, resistance bands can be adjusted to suit your individual needs. Simply choose a band with the appropriate level of resistance for your current fitness level, and as you get stronger, you can gradually increase the resistance to keep challenging your muscles and seeing progress.

So, if you’re looking to add a new dimension to your arm workouts, I encourage you to embrace resistance bands as your new favorite workout tool. With their versatility, portability, and scalability, they’re sure to take your arm gains to the next level. Let’s harness the power of resistance band arm workouts and sculpt those arms like never before!
Sample Resistance Band Arm Workout Routine
| Exercise | Description | Reps/Sets | Resistance Level |
|---|---|---|---|
| Bicep Curls | Stand on the band, hold handles with underhand grip, curl up towards shoulders, squeeze biceps. | 12-15 reps / 3 sets | Light to Medium |
| Tricep Extensions | Anchor band behind, grasp handles with overhand grip, extend arms overhead, lower behind head, extend back up. | 12-15 reps / 3 sets | Light to Medium |
| Shoulder Press | Stand on band with both feet, hold handles at shoulder height, press overhead until arms fully extended, lower back down. | 12-15 reps / 3 sets | Medium to Heavy |
| Lateral Raises | Stand on band with both feet, hold handles with overhand grip, raise arms to sides until parallel to ground, lower back down. | 12-15 reps / 3 sets | Light |
| Burnout HIIT Round | Perform each exercise at maximum intensity for 30 seconds, followed by 15 seconds rest. Rotate through bicep curls, tricep extensions, shoulder presses, and lateral raises. | 3 rounds | Adjust resistance as needed |
Tips for Success
- Warm-Up: Always start with dynamic stretches such as arm circles and shoulder rolls to prepare your muscles.
- Form: Maintain proper form to maximize effectiveness and prevent injury. Slow, controlled movements are key.
- Progression: Gradually increase resistance as you get stronger to continue challenging your muscles.
- Hydration: Drink plenty of water before, during, and after your workout to stay hydrated.
- Cool Down: End your workout with a cool-down session and stretching to aid muscle recovery.
Common Mistakes to Avoid
- Using Too Much Resistance: Start with a lighter band and focus on form before increasing resistance.
- Skipping Warm-Up/Cool-Down: These steps are crucial for preventing injury and aiding in recovery.
- Relying on Momentum: Ensure slow, controlled movements to maximize muscle engagement and avoid swinging the band.
- Neglecting Stabilizer Muscles: Include exercises that target stabilizer muscles to improve overall muscle balance and strength.
Warm-Up and Preparing for the Burn
Let’s continue the resistance band arm workout journey. But before we dive into the exercises, it’s crucial to lay down some groundwork and ensure we’re adequately prepared for the burn that awaits us.
First and foremost, let’s talk about the importance of warming up. Warming up before any workout routine, especially one as intense as a resistance band arm workout, is absolutely essential. It helps increase blood flow to the muscles, loosens up the joints, and prepares the body for the physical exertion ahead. Skipping the warm-up not only increases the risk of injury but also hinders your performance during the actual workout.
Now, when it comes to warming up the arms specifically for our resistance band arm workout, dynamic stretching exercises are the way to go. These exercises involve moving the muscles and joints through their full range of motion, which helps improve flexibility, mobility, and overall performance. Some dynamic stretching exercises tailored to prepare the arms include arm circles, shoulder rolls, and arm swings.
But warming up is only half the battle. The other half is ensuring that we’re using proper form and technique throughout the entire workout. Proper form not only prevents injuries but also ensures that we’re effectively targeting the muscles we intend to work. When using resistance bands, it’s important to maintain tension on the band throughout the entire range of motion and to control the movement with slow, deliberate motions. This not only maximizes the effectiveness of the exercise but also minimizes the risk of injury.
So, as we prepare to embark on our resistance band arm workout journey, let’s remember the importance of warming up, engaging in dynamic stretching exercises tailored to our arms, and emphasizing proper form and technique. By doing so, we’ll not only prevent injuries but also maximize our results and set ourselves up for success. Let’s get ready to feel the burn and unleash the power of our resistance band arm workout!
Complete Arms Workout Video
Pump Up Your Arms with Resistance Band Arm Workout
Alright, let’s dive into pumping up those arms with our resistance band arm workout routine! Today, I’m going to break down each exercise in detail so you can get the most out of your workout and achieve those sculpted, defined arms you’ve been dreaming of.
First up, we’ve got bicep curls. This exercise is perfect for targeting those biceps and building strength and definition in the front of the arms. To perform bicep curls with resistance bands, simply step on the band with one foot and grasp the handles with an underhand grip. Keep your elbows tucked in at your sides and slowly curl the handles up towards your shoulders, squeezing your biceps at the top of the movement. Then, slowly lower the handles back down to the starting position and repeat for the desired number of reps.
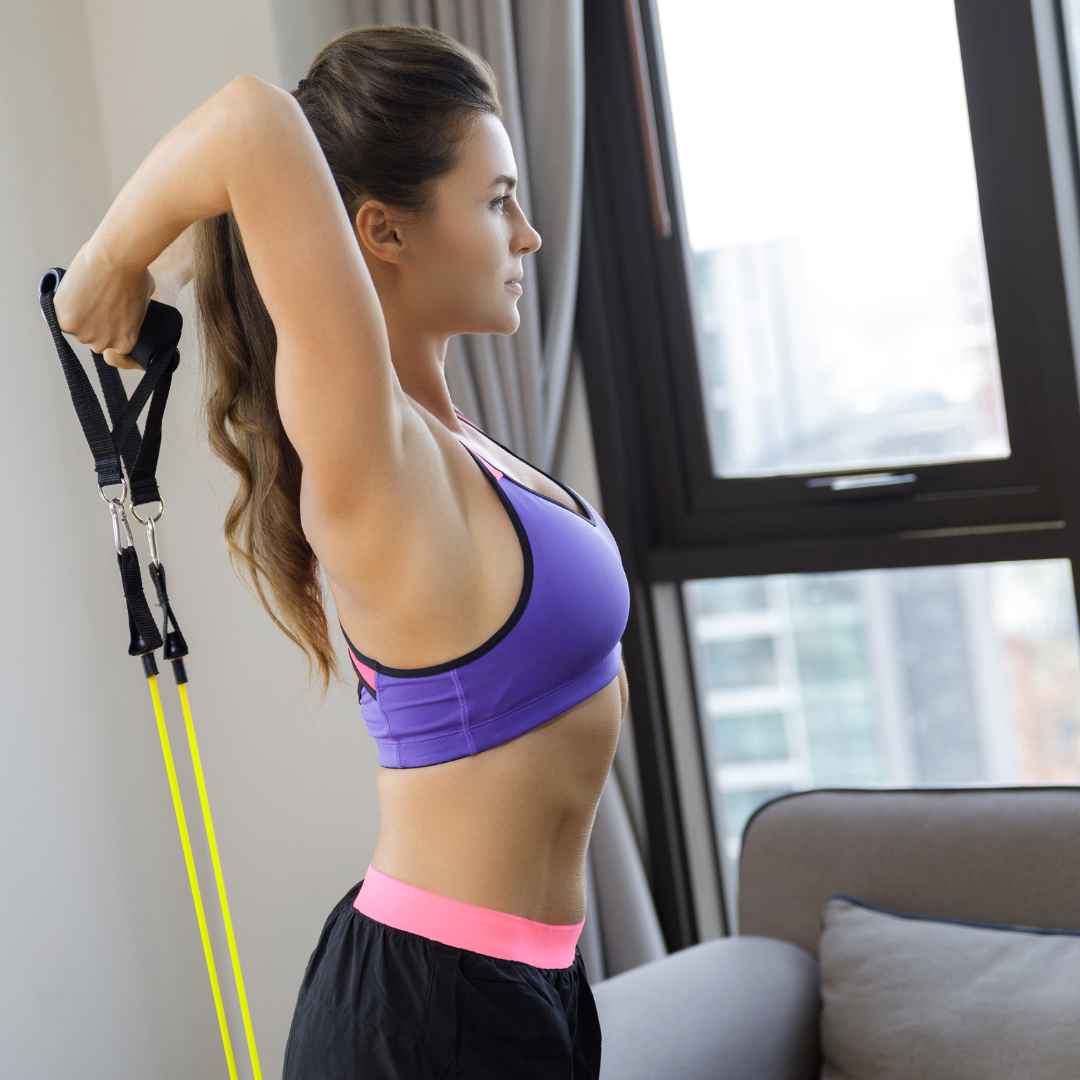
Next, let’s tackle tricep extensions. If you’re looking to banish those dreaded bat wings and sculpt sleek, toned arms, this exercise is for you. To perform tricep extensions with resistance bands, anchor the band securely behind you and grasp the handles with an overhand grip. Extend your arms straight overhead, keeping your elbows close to your ears, then slowly lower the handles behind your head until your elbows reach a 90-degree angle. Contract your triceps to extend your arms back to the starting position and repeat.
Moving on to shoulder press, this exercise is great for strengthening and toning the shoulders, giving you that confident posture and sleek silhouette. To perform shoulder presses with resistance bands, step on the band with both feet and grasp the handles with an overhand grip. Start with your hands at shoulder height, elbows bent and palms facing forward. Press the handles overhead until your arms are fully extended, then lower them back down to shoulder height and repeat.
Last but not least, let’s talk about lateral raises. Say goodbye to flabby arms and hello to sleek definition with this powerful move. To perform lateral raises with resistance bands, step on the band with both feet and grasp the handles with an overhand grip. Start with your arms by your sides and palms facing in towards your body. Keeping a slight bend in your elbows, raise your arms out to the sides until they’re parallel to the ground, then slowly lower them back down and repeat.
Now, let’s make sure we’re catering to all fitness levels with some variations and modifications for each exercise. For beginners, start with lighter resistance bands and focus on mastering the proper form before increasing the intensity. For more advanced exercisers, try using heavier resistance bands or increasing the number of reps and sets.
As for getting the most out of each exercise, focus on maintaining proper form throughout the entire range of motion. Avoid using momentum to swing the bands, as this can reduce the effectiveness of the exercise and increase the risk of injury. Instead, move slowly and deliberately, squeezing your muscles at the top of each movement for maximum muscle engagement.
And finally, let’s talk about common mistakes to avoid. One of the most common mistakes I see people make is using too much resistance and sacrificing form. Remember, it’s better to use lighter resistance and maintain proper form than to use heavier resistance and risk injury. Additionally, make sure to keep your core engaged and your spine neutral throughout each exercise to protect your back and maintain stability.
So there you have it, folks – a detailed breakdown of each exercise in our resistance band arm workout routine, along with variations, tips for success, and common mistakes to avoid. With this knowledge in hand, you’ll be well on your way to sculpted, defined arms that you’ll be proud to show off. Let’s get to work and unleash the power of our resistance band arm workout!
The Burnout Round
It’s time to kick things up a notch with the burnout round of our resistance band arm workout! This is where we really push the limits and challenge our muscles to their fullest potential.
For the burnout round, we’re going to incorporate some high-intensity interval training (HIIT) techniques with resistance bands to really get that extra calorie burn and take our workout to the next level. HIIT involves alternating between short bursts of intense exercise and brief periods of rest or lower-intensity activity. It’s a great way to maximize calorie burn and boost metabolism, making it perfect for anyone looking to shed some extra pounds or increase their overall fitness level.
So, how do we incorporate HIIT techniques with resistance bands? It’s simple. We’ll choose a few of our favorite resistance band arm exercises – such as bicep curls, tricep extensions, shoulder presses, and lateral raises – and perform each exercise at maximum intensity for a set period of time, followed by a short rest period. For example, we might do 30 seconds of bicep curls followed by 15 seconds of rest, then move on to tricep extensions, and so on.
The key here is to really push ourselves during the work intervals, giving it our all and squeezing out as many reps as possible. This is where the burnout really kicks in, and it’s where we see those incredible results start to take shape. By challenging our muscles to their limits and pushing through the burn, we’re able to stimulate growth and strength gains like never before.
Now, I won’t lie to you – the burnout round isn’t easy. It’s tough, it’s intense, and it’s going to push you to your limits. But trust me when I say that it’s worth it. The feeling of accomplishment you’ll get from pushing through the burn and completing the workout is unmatched, and the results you’ll see in your arms will speak for themselves.
So, I encourage you to give it your all during the burnout round of our resistance band arm workout. Push through the burn, embrace the challenge, and remember why you started in the first place. With dedication, perseverance, and a little bit of sweat, you’ll be amazed at what you can achieve.

Cool Down and Stretching in the Resistance Band Arm Workout
Alright, team, we’ve crushed our resistance band arm workout, but before we call it a day, it’s crucial that we take some time for a proper cool down and stretching session. Trust me, this step is just as important as the workout itself when it comes to aiding in muscle recovery and maintaining flexibility.
First and foremost, let’s stress the importance of cooling down after our workout. Cooling down helps gradually bring our heart rate and breathing back to normal, prevents blood from pooling in our muscles, and reduces the risk of dizziness or fainting. It’s our way of signaling to our bodies that the hard work is done and it’s time to transition back to a state of rest and relaxation.
Now, onto stretching. Stretching post-workout is crucial for maintaining flexibility, preventing muscle stiffness, and reducing the risk of injury. Plus, it just feels darn good! I’m going to walk you through a series of soothing stretches targeting the arms and upper body, so grab your resistance bands and let’s get started.
First up, we have the tricep stretch. Extend your right arm overhead and bend your elbow, reaching your right hand down towards your upper back. Use your left hand to gently press your right elbow towards the center of your head, feeling a deep stretch along the back of your arm. Hold for 15-30 seconds, then switch sides and repeat.
Next, let’s move on to the shoulder stretch. Bring your right arm across your body and use your left hand to gently press your right elbow towards your chest. Feel the stretch along the back of your shoulder and hold for 15-30 seconds before switching sides.
Now, let’s target those biceps with a classic bicep stretch. Extend your right arm out in front of you, palm facing up, and use your left hand to gently pull your fingers back towards your body. Feel the stretch along the front of your arm and hold for 15-30 seconds before switching sides.
And finally, let’s give our entire upper body a good stretch with a simple chest opener. Interlace your fingers behind your back and straighten your arms, lifting your chest towards the ceiling. Feel the stretch across your chest and shoulders and hold for 15-30 seconds.
As we wrap up our stretching session, it’s important to remember to hydrate and refuel our bodies after the workout. Drink plenty of water to replenish lost fluids and consider having a small snack with protein and carbohydrates to help repair and rebuild your muscles.
So there you have it, folks – a comprehensive cool down and stretching routine to complement our resistance band arm workout. By taking the time to cool down properly and stretch out those hard-working muscles, we’ll not only aid in recovery but also set ourselves up for success in future workouts. Let’s give ourselves a round of applause for a job well done, and remember to prioritize recovery just as much as we prioritize our workouts. Cheers to strong, flexible, and healthy arms!
Final Thoughts on Resistance Band Arm Workout
As we wrap up our discussion on resistance band arm workouts, let’s take a moment to recap the benefits and consider how they stack up against other forms of arm exercises like bodyweight exercises or traditional weight lifting.
First and foremost, one of the key advantages of resistance band arm workouts is their versatility. With resistance bands, you can easily adjust the level of resistance simply by changing the band or adjusting your grip. This makes them suitable for exercisers of all fitness levels, from beginners to seasoned athletes. Plus, resistance bands are lightweight and portable, making them perfect for on-the-go workouts or home gym setups.
Another benefit of resistance band arm workouts is their ability to provide constant tension throughout the entire range of motion. Unlike traditional weights, which rely on gravity for resistance, resistance bands offer resistance in both directions – both when you’re stretching the band and when you’re releasing it. This constant tension helps to recruit more muscle fibers and can lead to greater muscle activation and growth.
Additionally, resistance band arm workouts are great for targeting smaller stabilizer muscles that may not get as much attention with traditional weight lifting exercises. By incorporating resistance bands into your routine, you can improve overall muscle balance and reduce the risk of injury.
But what about bodyweight exercises or traditional weight lifting exercises? While these forms of exercise certainly have their own benefits, they may not offer the same level of versatility or convenience as resistance band arm workouts. Bodyweight exercises, for example, rely solely on your own body weight for resistance, which may not be challenging enough for more advanced exercisers. Traditional weight lifting exercises, on the other hand, require access to bulky equipment and may not be suitable for those with limited space or budget constraints.
So, where does that leave us? Well, in my opinion, resistance band arm workouts offer the best of both worlds – they’re versatile, effective, and accessible to virtually everyone. Whether you’re a beginner looking to tone and sculpt your arms or a seasoned gym-goer looking to mix up your routine, resistance bands have something to offer.
So, I encourage you to incorporate resistance band arm workouts into your fitness regimen for stronger, more defined arms. Start by following the routine we’ve discussed today, and don’t be afraid to experiment with different exercises and resistance levels to find what works best for you.
And remember, progress takes time and dedication, so stay consistent and motivated on your fitness journey. Celebrate your successes, no matter how small, and don’t be afraid to reach out for support when you need it. We’re all in this together, and together, we can achieve our fitness goals.
Finally, I want to extend a heartfelt invitation to all of you to share your experiences with the resistance band arm workout or connect with our community on social media platforms. Whether you’re looking for tips, motivation, or just a friendly ear, our community is here to support you every step of the way.
So let’s strap on those resistance bands, flex those muscles, and take our arm workouts to the next level. Together, we’ll sculpt stronger, more defined arms and crush our fitness goals. Here’s to a healthier, happier you – let’s make it happen!


